- 2. Install & Update The Theme 1312
- 3. How To Change Header Style?
- 4. How To Change Footer Style?
- 5. How To Change Button Style?
- 6. How To Enable Header Offer Style?
- 7. How To Enable Dynamic Category Menu?
- 8. How To Apply Clarico Vega Extra Page Snippets?
- 9. Mega Menu
- 10. Menu Label
- 11. Vertical Menu
- 12. Product Label
- 13. Set Row Limit to Product Name
- 14. Quick Filter
- 15. LOAD PRODUCTS THROUGH AJAX
- 16. PRODUCT BRAND
- 17. PRODUCT DESCRIPTION
- 18. DYNAMIC PRODUCT TABS
- 19. OFFER TIMER
{:toc} ## 1. Overview Clarico Vega is a Responsive, Clean, Modern & Sectioned Odoo eCommerce Theme. Crafted to be Pixel Perfect, it can be suitable for any kind of online store category like Furniture, Fashion, Electronics, Beauty, Health & Fitness, Jewellery, Sports etc. Clarico Vega is an Ecommerce business-oriented theme that fulfils the main feature of eCommerce. It is a fully responsive theme and looks equally stunning on all kinds of screens and devices. It is built with various attractive features like 10 Custom Header styles, 7 Custom Footer Styles, 16 Custom Button Styles, 6 Custom Mega Menu Layouts, Lazy Load, Load More products, Quick View, Login Popup, Price Filter, 10+ Dynamic Snippets, 115+ Designed Custom Snippets etc.
{:toc} ### 1.1 sub-child Clarico Vega is a Responsive, Clean, Modern & Sectioned Odoo eCommerce Theme. Crafted to be Pixel Perfect, it can be suitable for any kind of online store category like Furniture, Fashion, Electronics, Beauty, Health & Fitness, Jewellery, Sports etc. Clarico Vega is an Ecommerce business-oriented theme that fulfils the main feature of eCommerce. It is a fully responsive theme and looks equally stunning on all kinds of screens and devices. It is built with various attractive features like 10 Custom Header styles, 7 Custom Footer Styles, 16 Custom Button Styles, 6 Custom Mega Menu Layouts, Lazy Load, Load More products, Quick View, Login Popup, Price Filter, 10+ Dynamic Snippets, 115+ Designed Custom Snippets etc.2. Install & Update The Theme 1312
Before installing the Theme Clarico Vega, make sure that you have downloaded the latest Odoo version as well as the latest version of Theme Clarico Vega along with its submodules.
1. Install Theme
After downloading the Theme Clarico Vega from the Odoo store, you will get the multiple folders and there is one folder named “theme_clarico_vega”. It’s a theme folder and other folders are dependent modules.
Add all of the folders in your addons directory and restart the Odoo server and update your app list from the ‘Apps’ menu from the admin view.
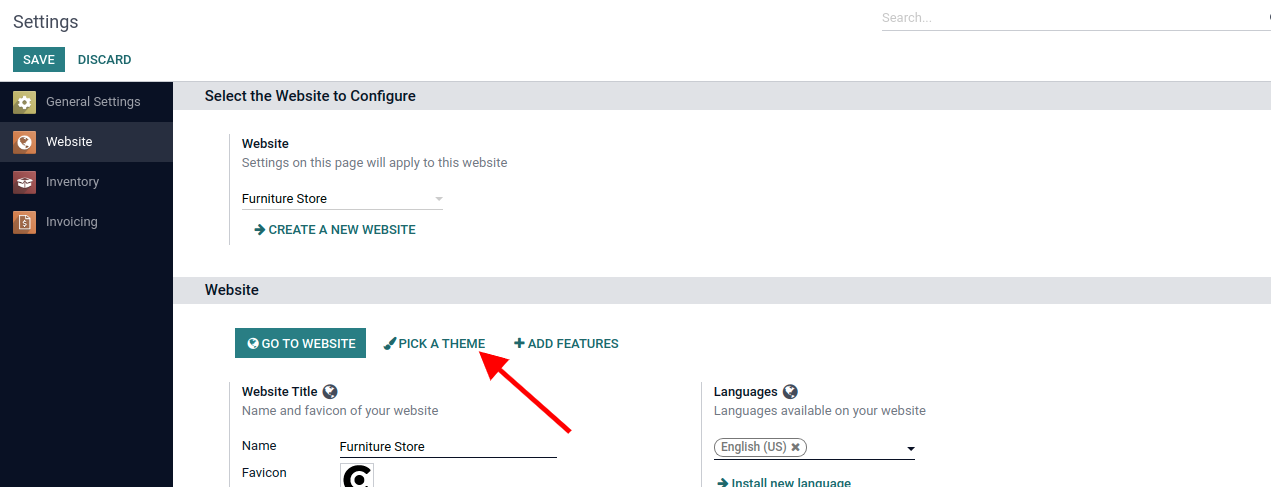
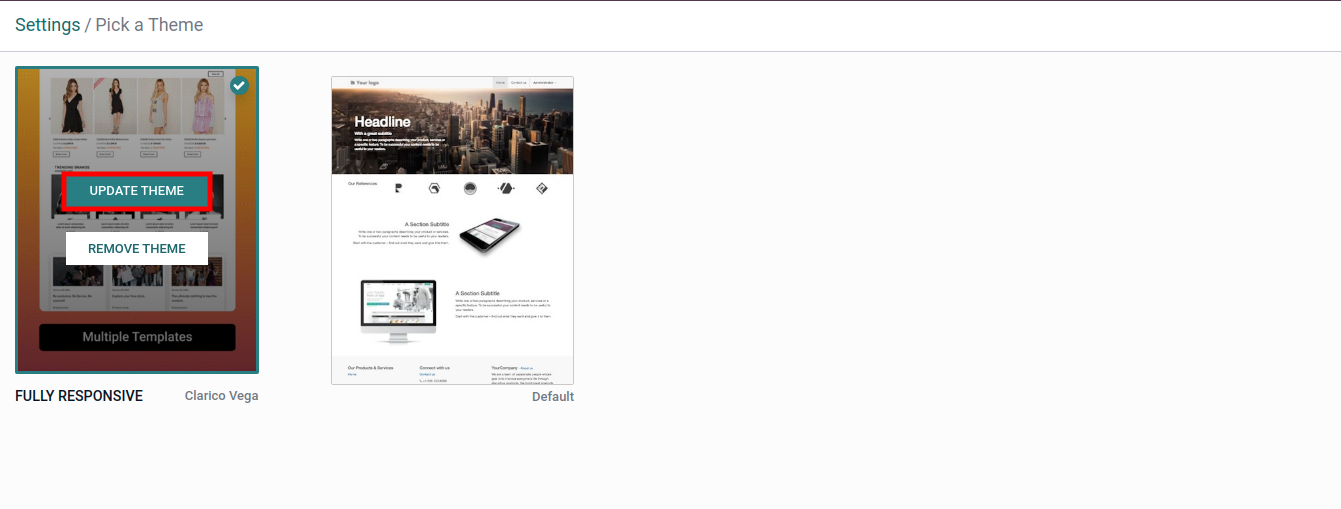
Now go to Website / Configuration / Settings. In Website settings, select a website in which you want to install Theme Clarico Vega, click on the PICK A THEME button. You will be redirected to the list of available themes. Click on Theme Clarico Vega to Install it on your website.
2. Update The Clarico Vega
To update the latest version of the theme, First, download it from Odoo Store and replace it with your existing Theme source code. There can be two scenarios for updating Theme features.
a) Changes Into Emipro Theme Base: These modules contain business logic and functional elements for all Emipro eCommerce themes in Odoo V15. So if there are any changes in business logic, then you need to mandatory upgrade the “Emipro Theme Base” module.
b) Changes Into Theme Clarico Vega: Theme Clarico Vega’ contains UI elements. So if there are any updates related to UI or template then you need to upgrade the Theme. For that, navigate to Website / Configuration / Settings and select the website and click on PICK A THEME then update the theme.
Note **Technical Steps to Install/Update Theme Clarico Vega:
- Copy and paste theme_clarico_vega and emipro_theme_base code into your custom module (Add/Replace).
- Restart the odoo services. (Ignore if you are using Odoo.sh)
- Go to Apps -> Update List (Please start debug mode first otherwise it will not show this menu).
- Find emipro_theme_base module & Install/Upgrade that module.
- Install/Update a theme Clarico Vega from Website Configuration.
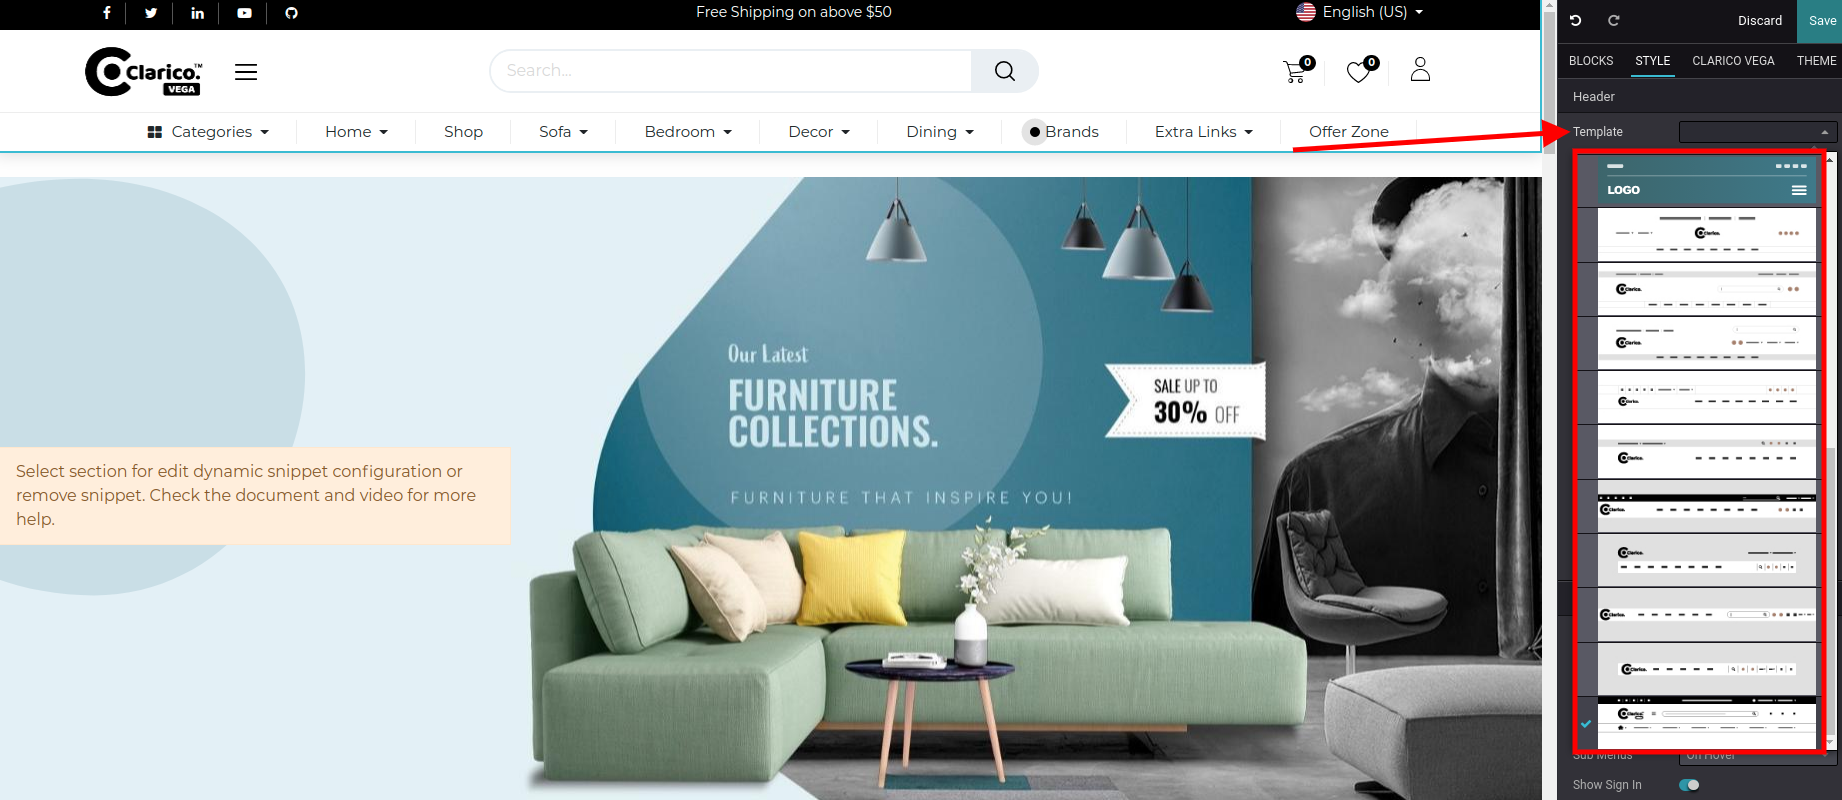
3. How To Change Header Style?
To change the header style, open Website Editor from the Website & click on the Header portion as shown below screenshot.
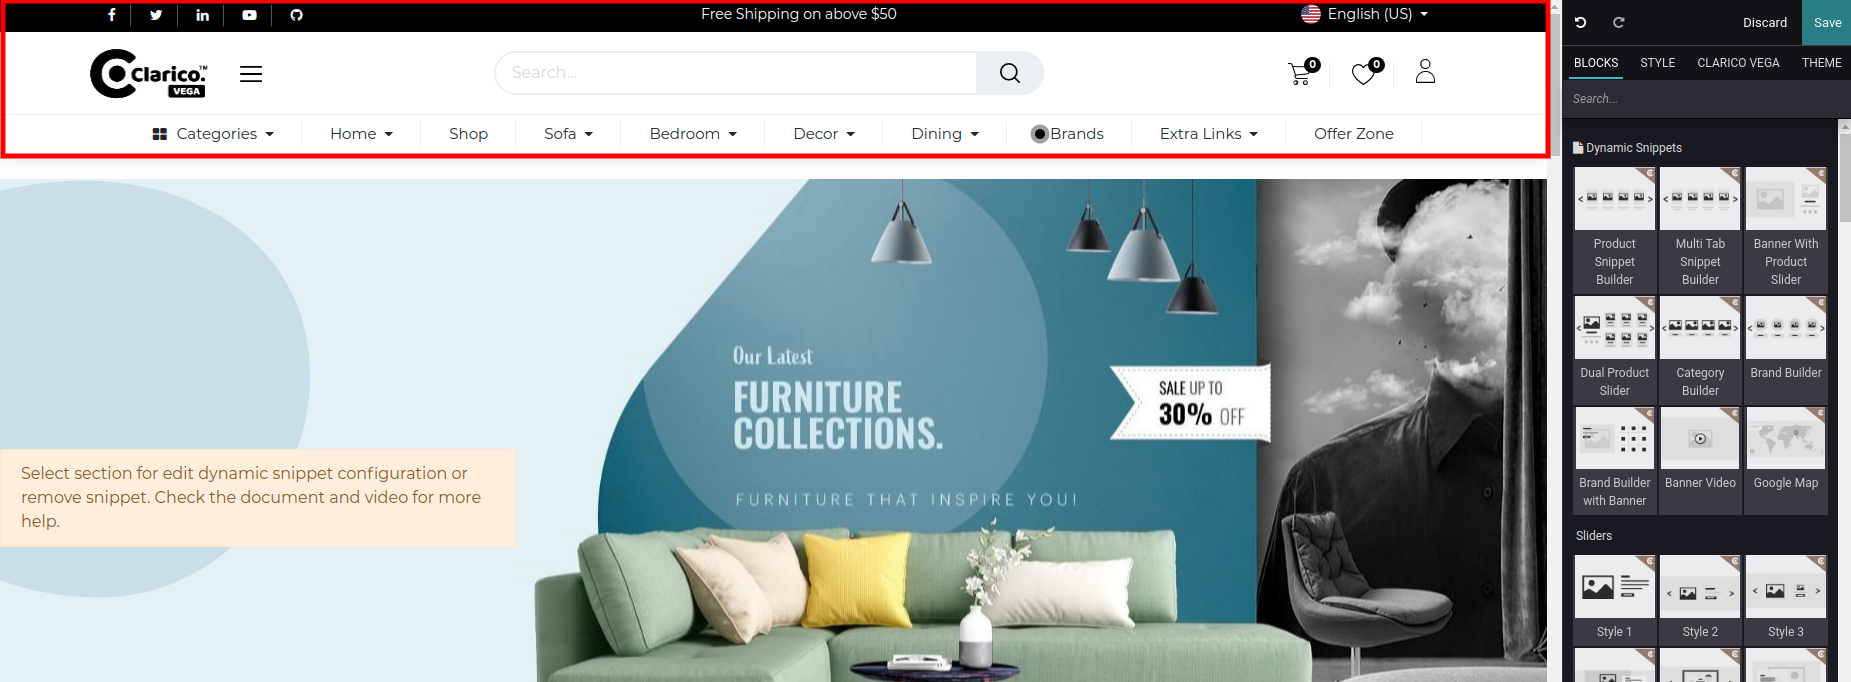
From the Header customize option, you can see the dropdown of available header option as per the below screenshot. Select the theme header and save the changes.
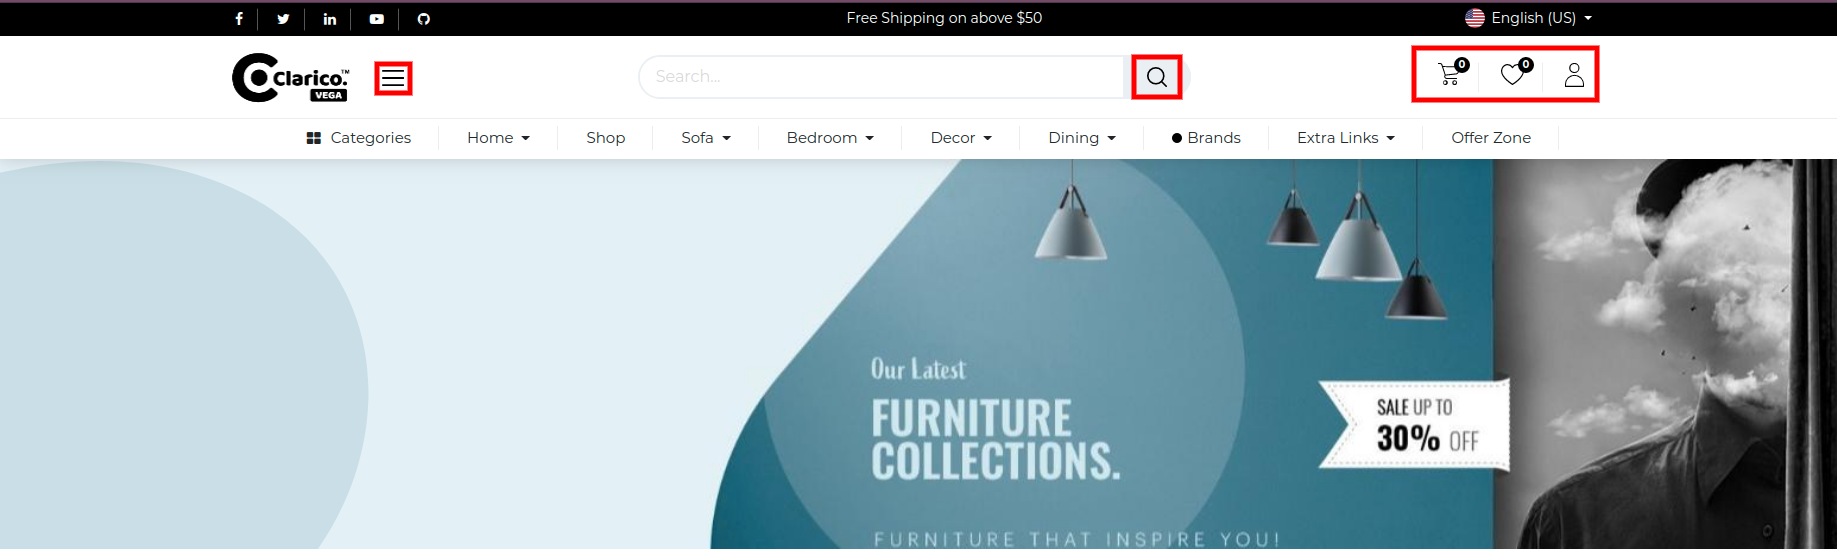
If you are using Custom Header Style number 10 and wants to update any icon like Vertical Menu, Search, Wishlist, Shopping Cart, User icon then you have to followed below steps:
Go to theme_clarico_vega/static/src/img/header_icons inside the theme folder You can find all the icons image which mentioned above Replace with your new image with same size and height Check the Header behaviour after restarting the server
4. How To Change Footer Style?
To change the footer style, open Website Editor from the Website & click on the Footer portion. Once you select the footer, you can see the dropdown of available footer options as shown as below screenshot. Select the appropriate theme footer and save the changes.

Button style 16 only for the gradient, in that we use Extra Color-2 and Extra Color-3 as per the screenshot above. You need to set up your gradient color in the Extra Colors option.
5. How To Change Button Style?
To change the button style, open Website Editor from the Website & click on Clarico vega option as shown in the below screenshot. You can find the Choose Button Style option & enable appropriate style and save the changes.

Button style 16 only for the gradient, in that we use Extra Color-2 and Extra Color-3 as per the screenshot above. You need to set up your gradient color in the Extra Colors option.
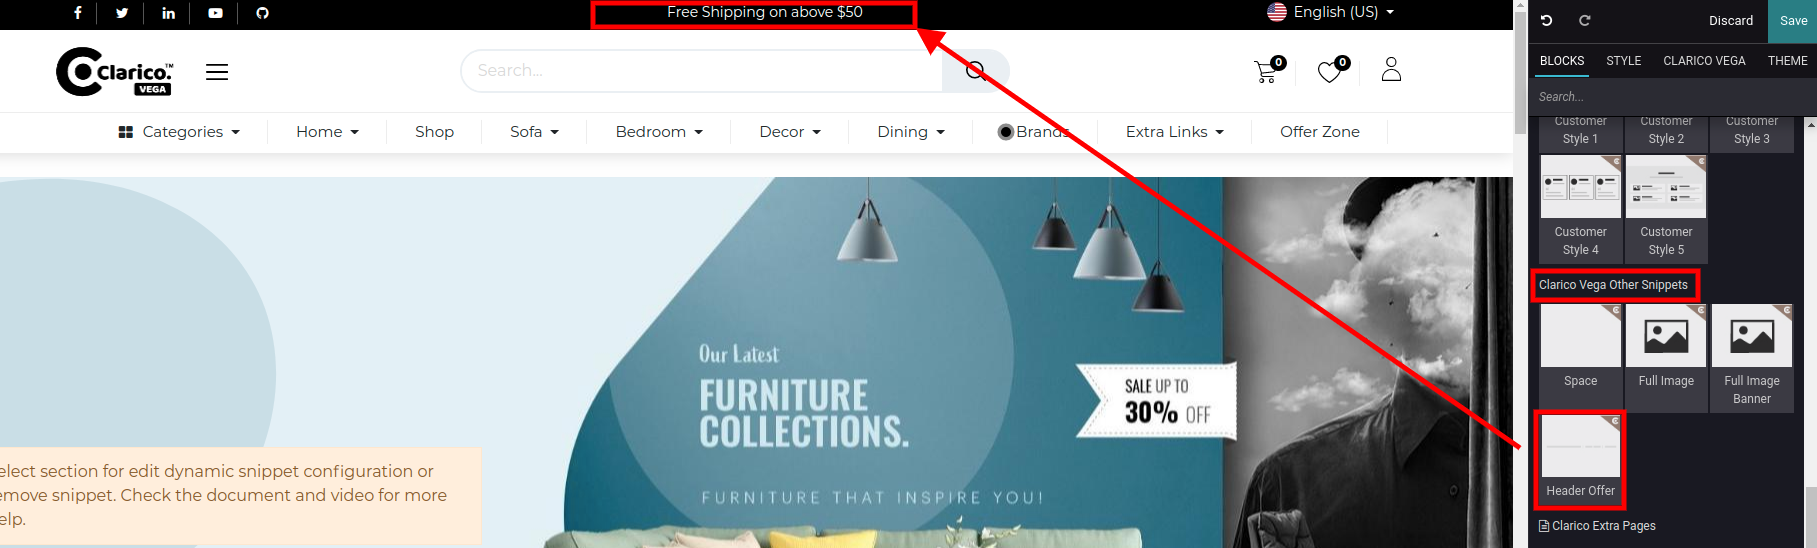
6. How To Enable Header Offer Style?
After selecting the header style, in some of the theme header offer text will be available by default. If you want to delete or edit them, then simply click on the Edit button from the top right of the webpage and edit that.
If you have deleted offer texts and you want that section back, then drag and drop the snippet named ‘Header Offer Text’ from the Inner Snippets category and save your changes.
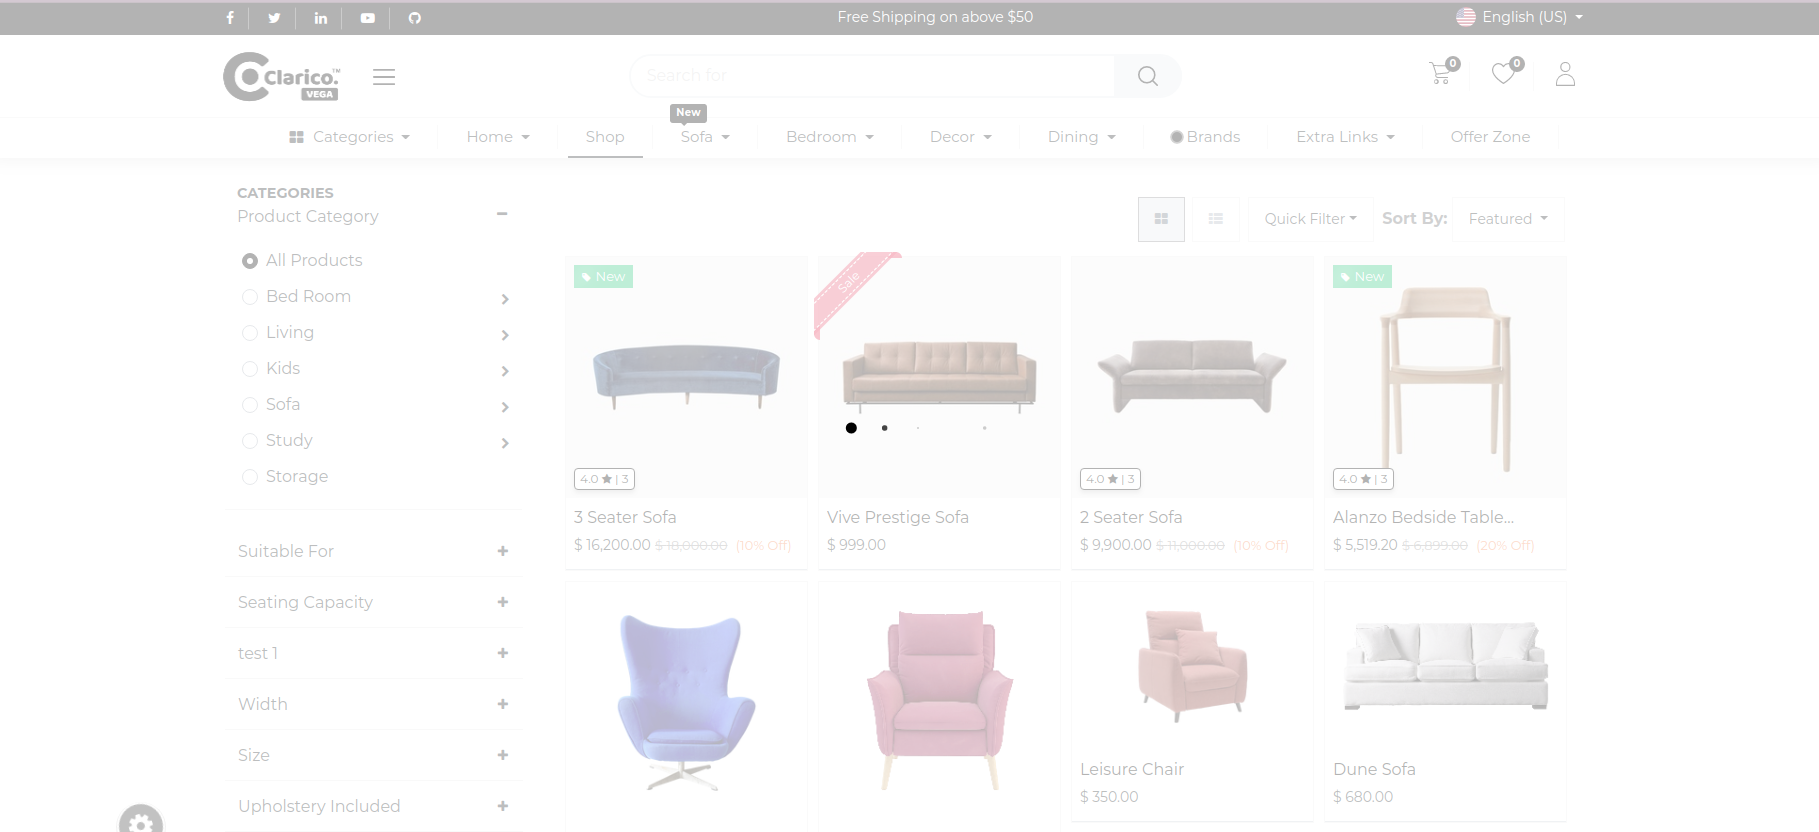
7. How To Enable Dynamic Category Menu?
To enable the dynamic category menu, Go to Web Pages / Pages / Edit menu and edit the menu which you want to set as a dynamic category menu.

As shown in the above screenshot there is one option to enable/disable the dynamic category menu. After enabling this option, this menu will show a list of categories dynamically with the category image as per the below screenshot.
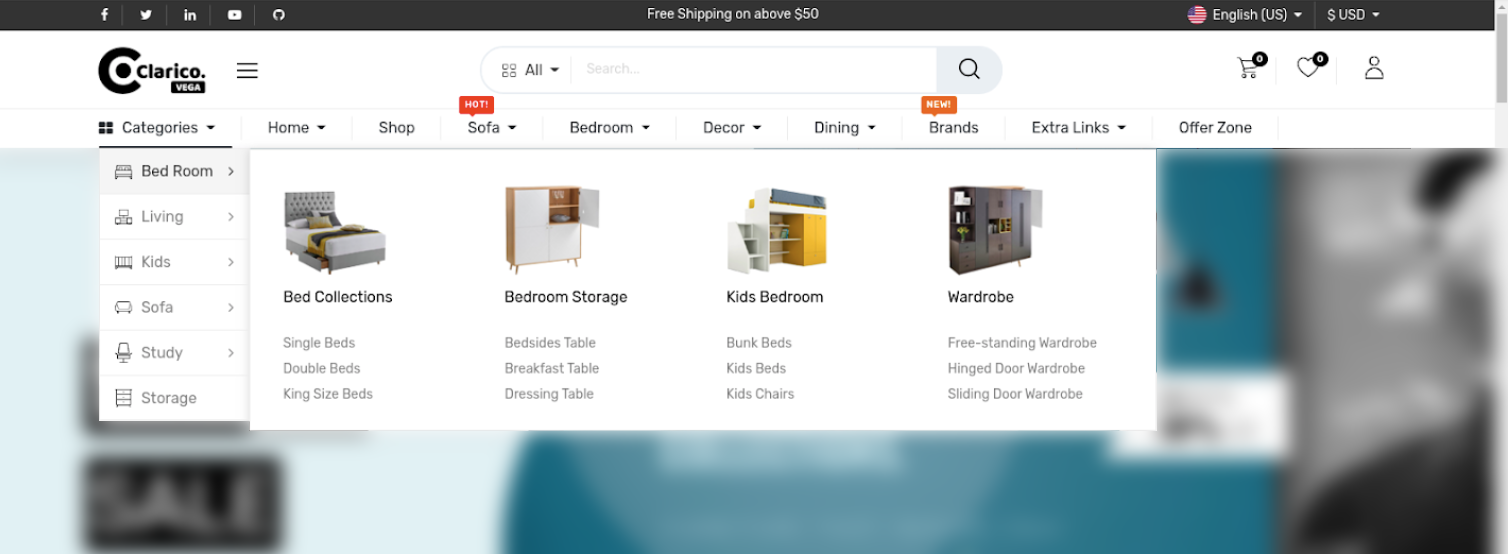
As you can see in the above screenshot, all the parent catergories of current website listed horizontally with category icons. When you hover on that specific category, you can see the child category with its image & its sub categories.
For update the parent category website icon, go to Odoo backend Ecommerce Category view & update the image as per the below screenshot.
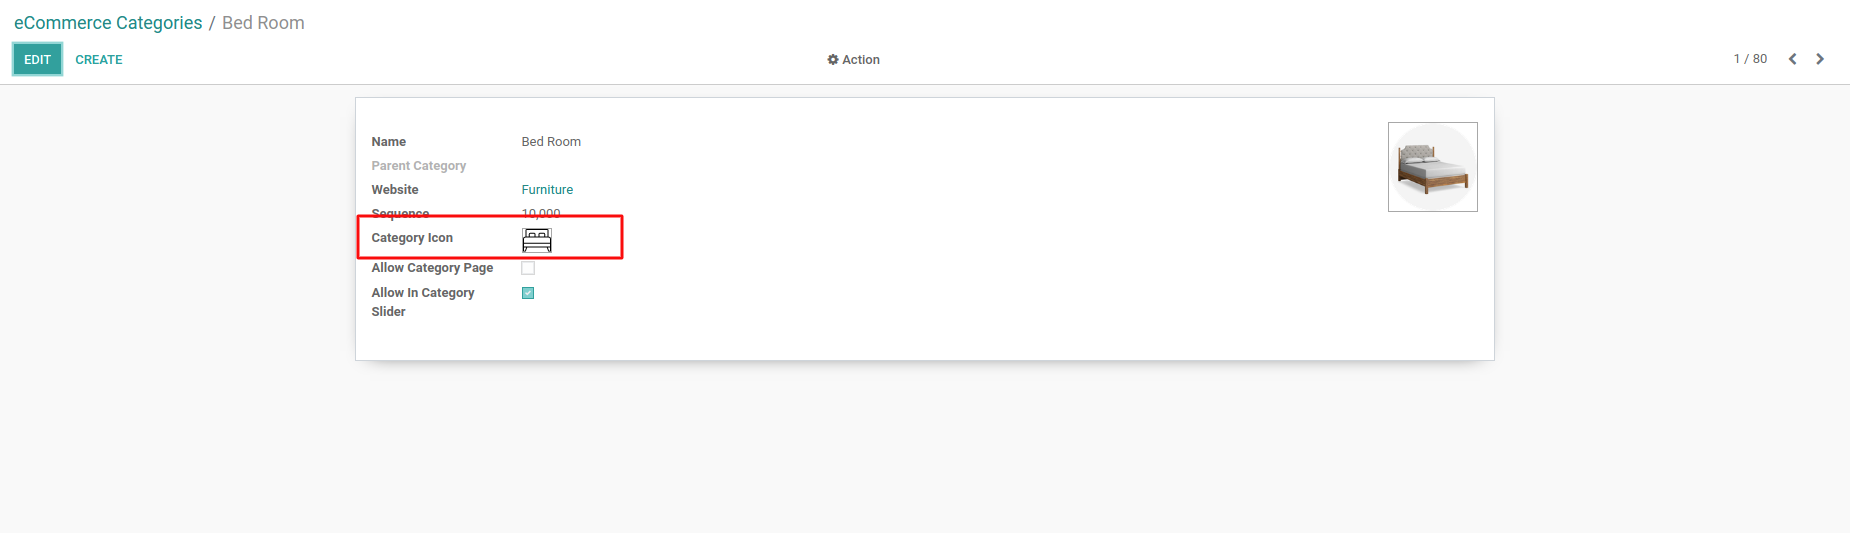
Its advisable to always place your Dynamic Category Menu as a first position in Header as per the screenshot in order to get proper user interface. Recommended image resolution: Parent Category Website Icon- 14 X 12 and Sub Category Image- 118 X 118.
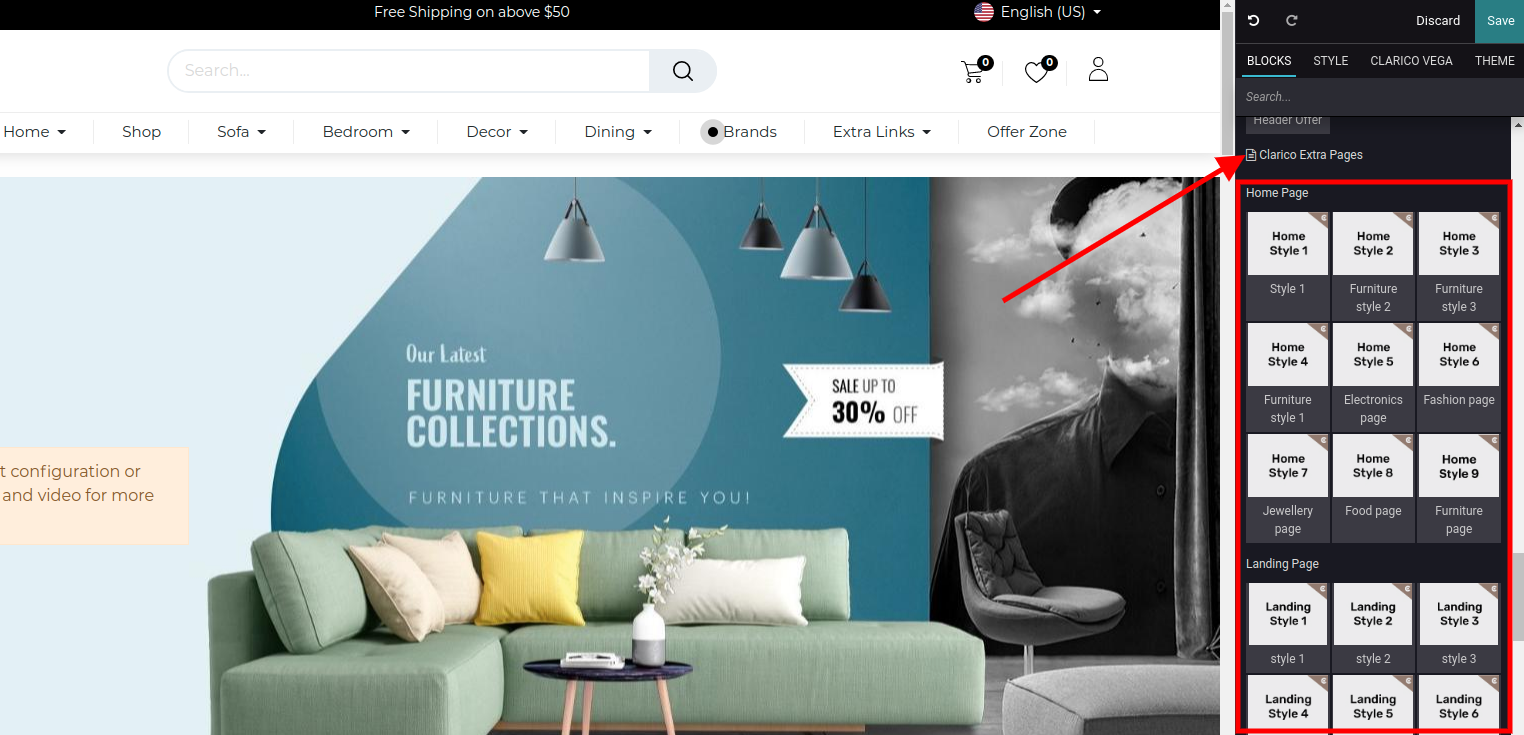
8. How To Apply Clarico Vega Extra Page Snippets?
We are providing various snippets of different pages in our theme Clarico Vega. There is no hassle to design your website. You can easily select the various predefined snippets like 8 unique Homepage snippets, 6 Custom Landing page snippets, 3 About us snippets, 3 Service snippets, 1 Contact us snippet and 4 Our Team snippets in order to design your website more pretty.
Note: You can find the page styles inside the snippet editor. You just need to create your page and apply the snippet.
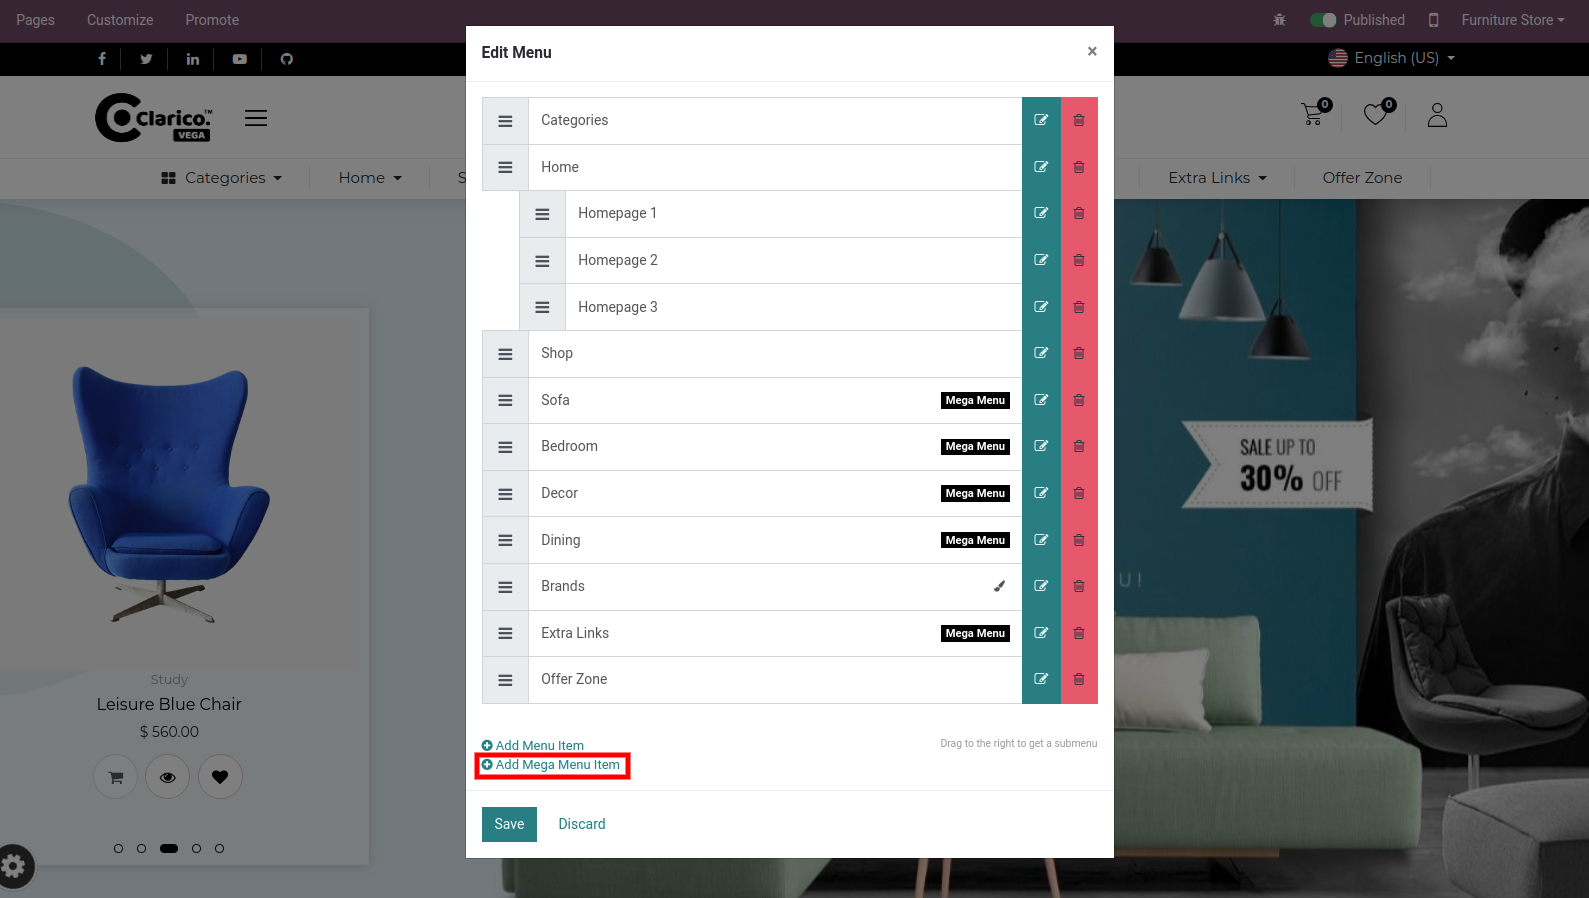
9. Mega Menu
To create a mega menu, go to a Web Page / Pages / Edit Menu and click on Add Mega Menu Item. It will show one popup to create a mega menu record.

Steps to set the mega menu style :
Step 1: Go to the website and click on the edit button for open Website Editor. Step 2: Click on the mega menu in which you want to change the design. Step 3: Check the snippets list on the left side of the web page as shown in the above screenshot. There are 6 snippets available to change the menu styles. Step 4: Drag the snippet in the menu which you want to set and remove the old style that you set previously.
 {:toc}
10. Menu Label
Using this feature, you can display one label top of the menu or right side of the menu. You can add the display text for the label as well you can configure the colour of that menu label.
To enable/disable the Menu label functionality, go to Web Pages / Customize / Customize Theme / Menu labels Text
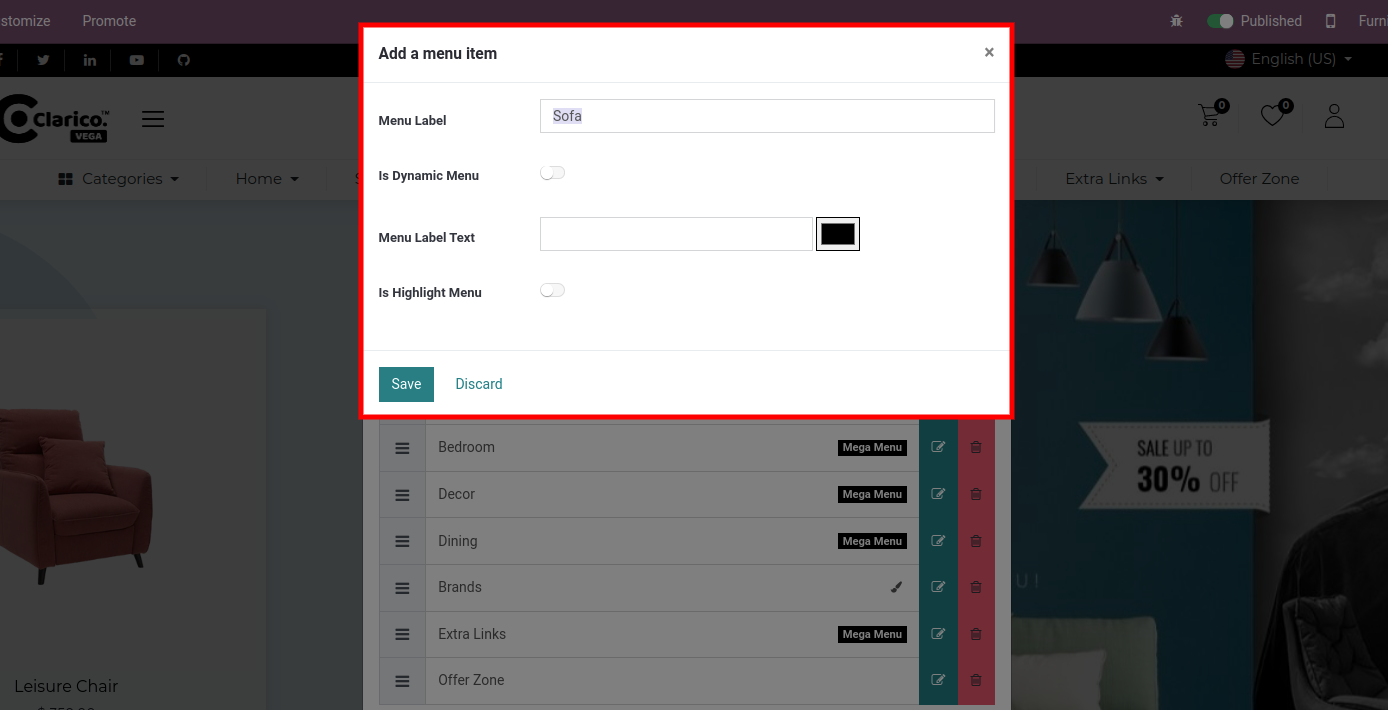
Steps to configure Menu labels:
Step 1: Go to the Pages tab and click on the edit menu option. Edit menu will pop up to select the menu. Step 2: Select the menu in which you want to apply the menu label. Click on the menu item and add a menu item popup will appear. Step 3: Enter the Menu label and Menu label text with the colour that you want to have the menu label and click on the Save button.
You can assign menu label and colour at the time of menu creation from the website editor panel.
 {:toc}
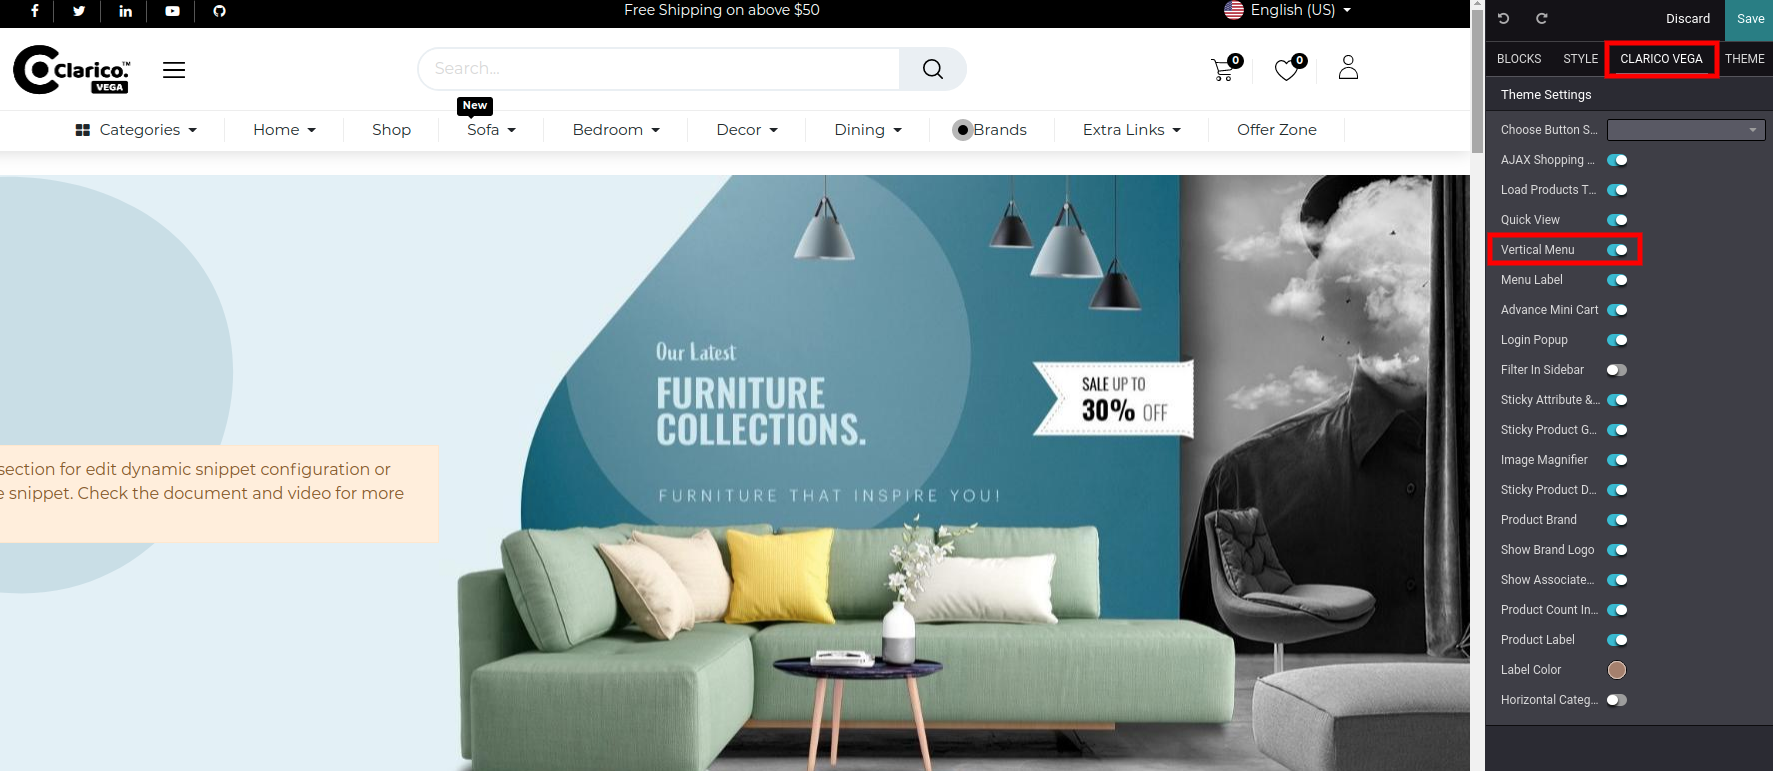
11. Vertical Menu
This feature provides you with one menu in the header section. It’s very handy when the user has multiple informative menus.
To enable/disable the Vertical Menu, open Website Editor from the Website & click on Clarico Vega as shown in the below screenshot.
You can find the option for enable/disable the vertical menu from that configuration as per the below screenshot.
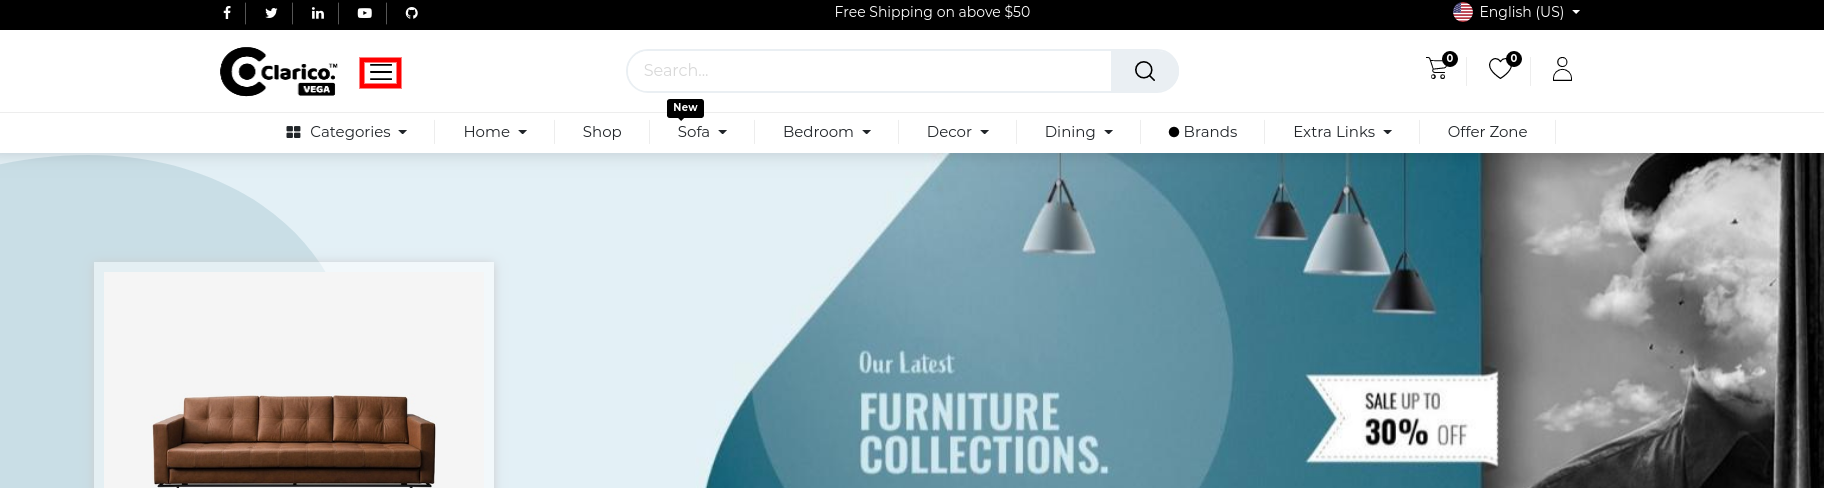
After enabling this feature you can see the vertical menu icon at the header of the Website as per the below screenshot.
 {:toc}
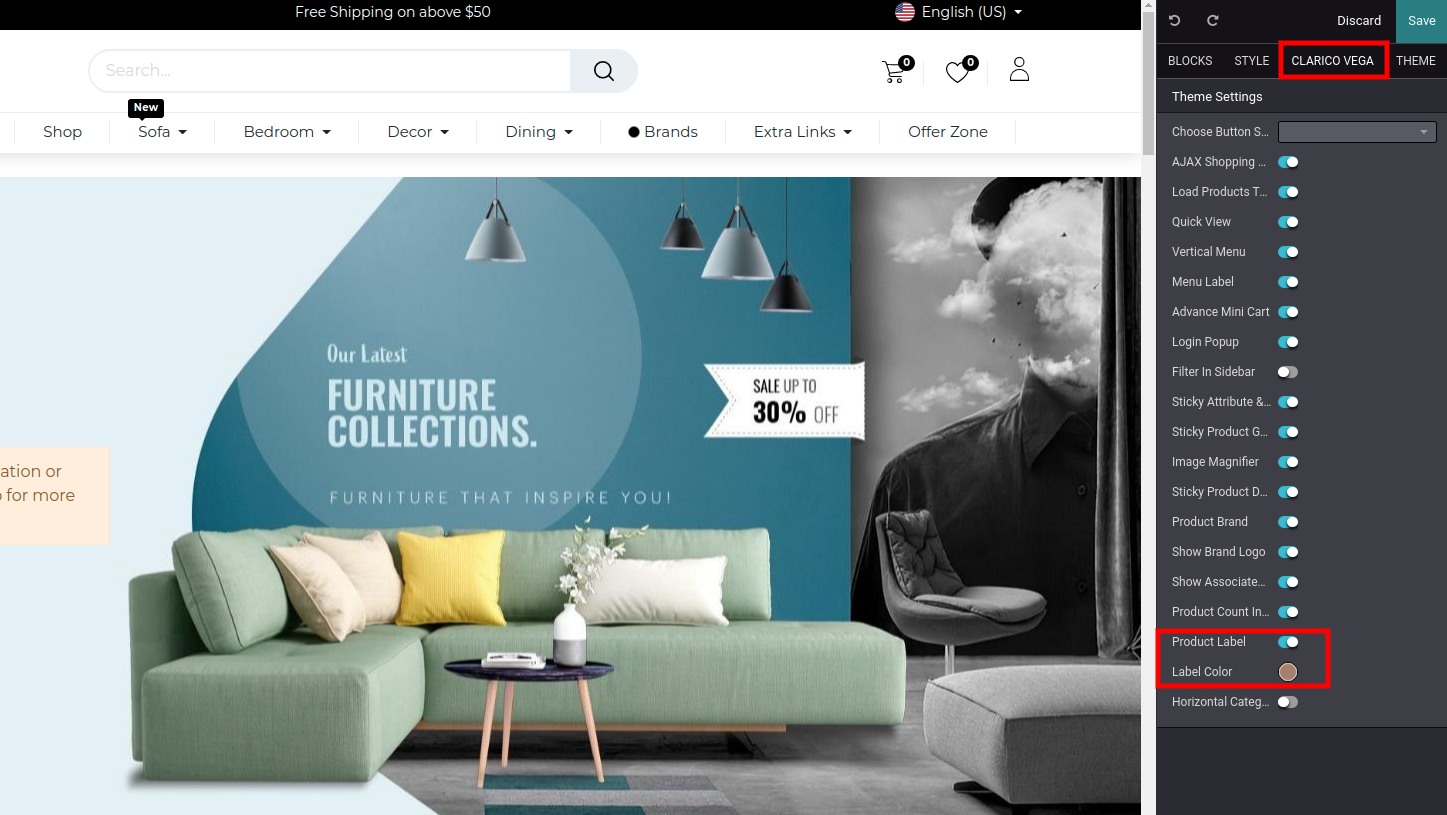
12. Product Label
To enable Product label, open Website Editor from the Website & click on Clarico Vega option. You can find the Product Label option & can enable it with default background colour of label as shown below screenshot.
Steps to configure the product label:
Step 1: Open the product records in the backend admin side. You can see the Product Label option inside the eCommerce tab as shown in the below screenshot. Where you can you can configure the product label with different styles as well as custom color based on the websites.

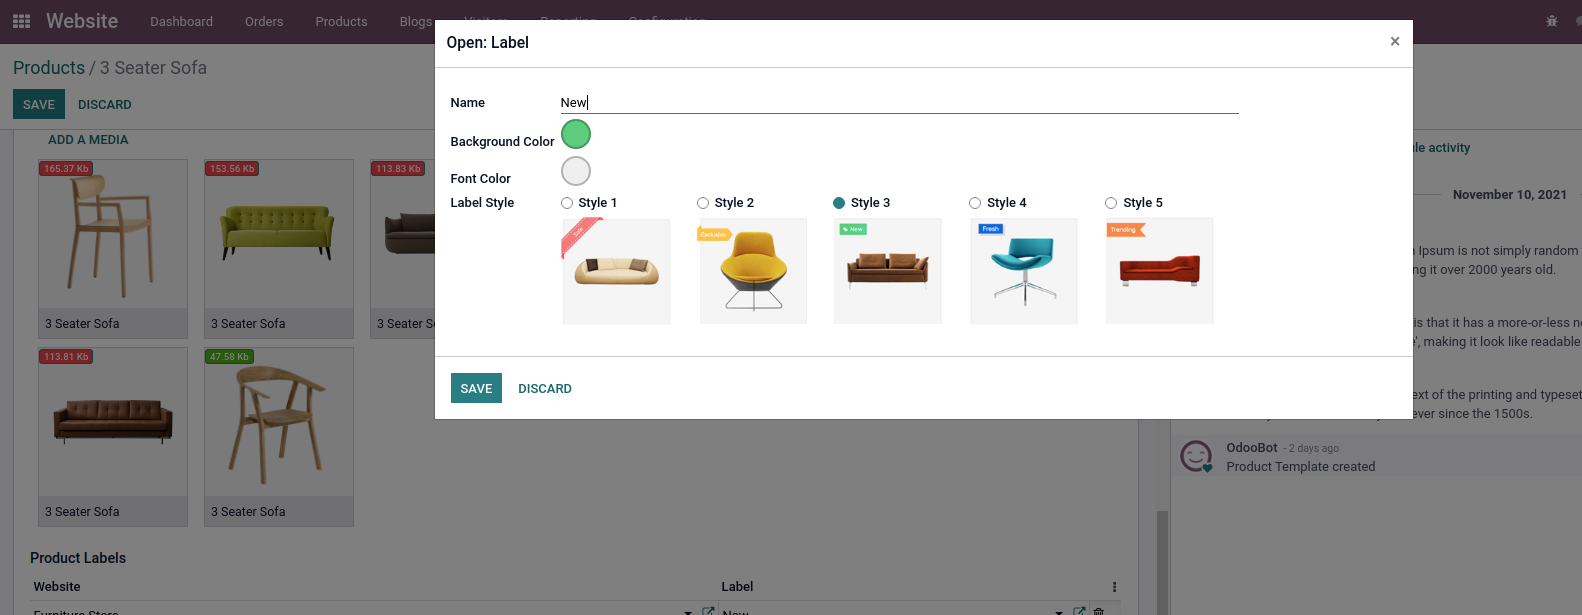
As per the above screenshot, you can customize the Product label also.
 {:toc}
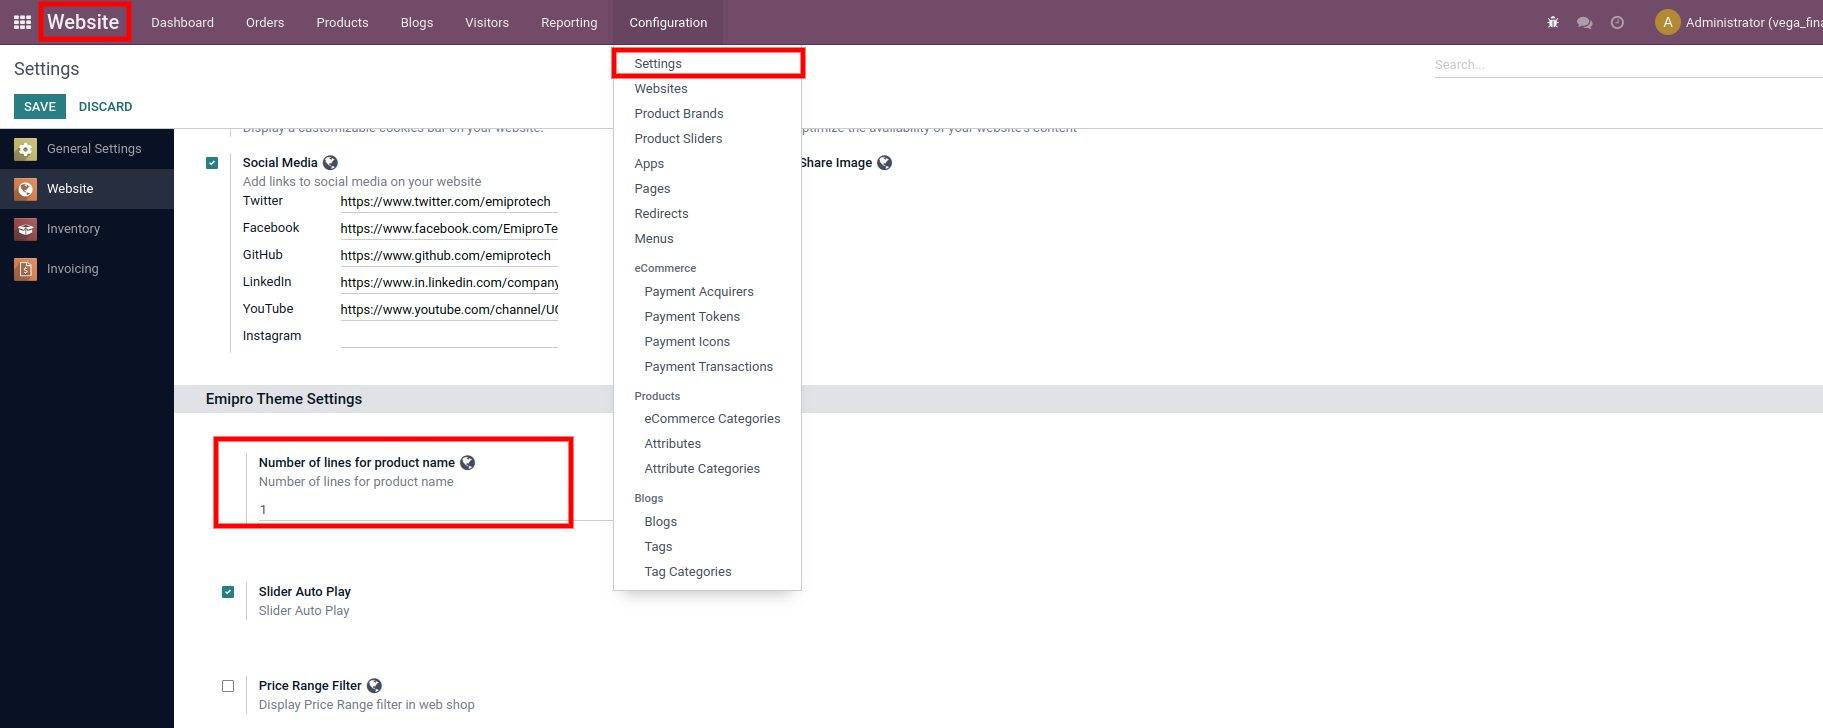
13. Set Row Limit to Product Name
This feature allows you to configure a number of rows to show your Product name in the Shop page, Accessory and Alternative product slider, Dynamic Product Sliders. If your products have longer names and you want to show them in two or three lines then you can configure it easily. By default, Products name will be displayed in one line.
Steps to configure the number of rows for display product name:
Step 1: Go to Website / Configuration / Settings. Select your website, in website, Vega is installed. Step 2: You can find one settings panel named ‘Emipro Theme Settings’. As per the below screenshot, you can select the number of row and save your changes.
 {:toc}
14. Quick Filter
Steps to configure the Quick Filter:
Step 1: In the admin side, go to Website / Configurations / Attribute and click on any attribute which you want to set as a quick filter.
Step 2: You can see that there is one selection field like “Quick Filter”. Check this button for setting an attribute as a quick filter and set the website if you want to set this on a particular website.
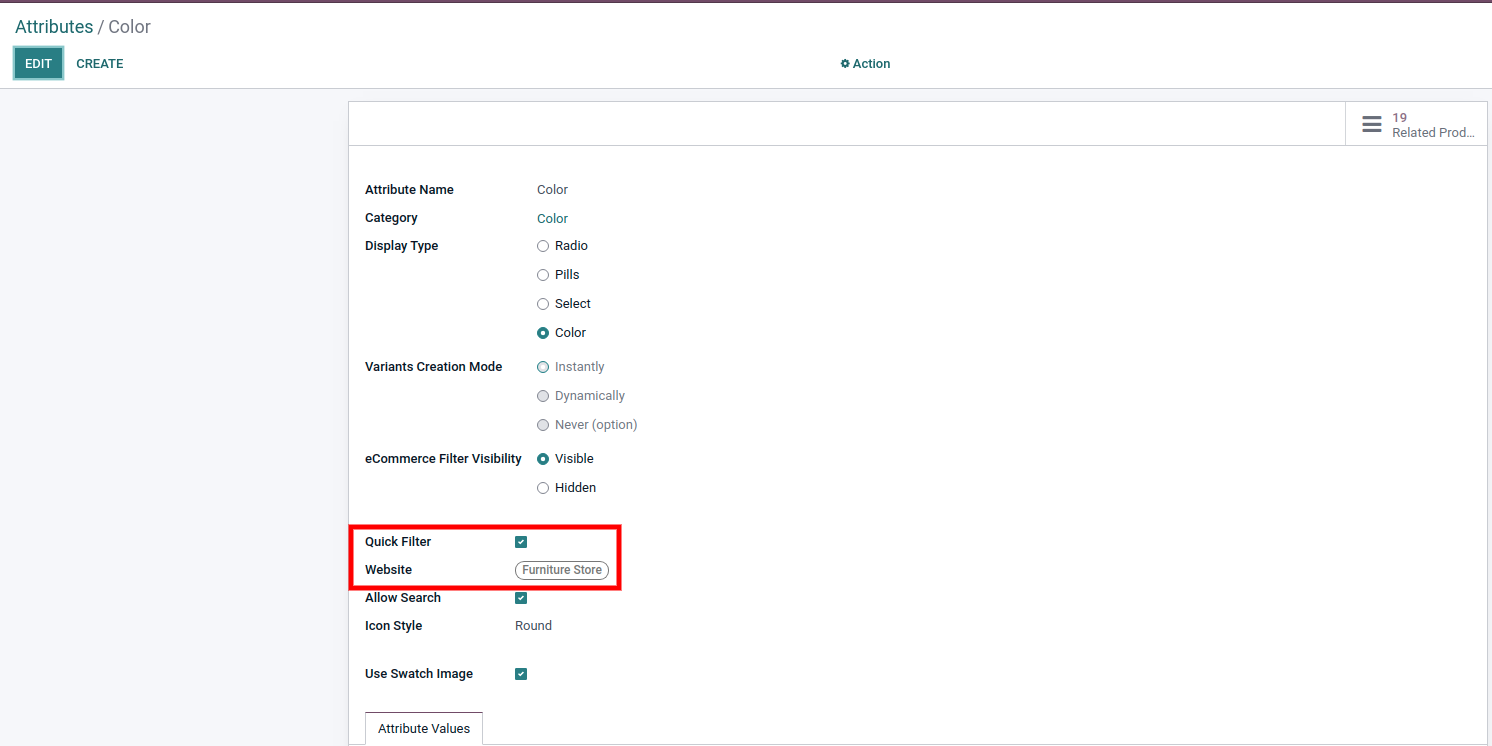
Step 3: Save your changes and check on the shop page. You can see it at the top right corner. There is one button like Quick Filter. Click on this button. It will show the list of attributes that you configured as a Quick Filter.
 {:toc}
15. LOAD PRODUCTS THROUGH AJAX
This feature provides the attribute filter data through ajax without reloading the page.
To enable/disable the Load through ajax, open Website Editor from the Website & click on Clarico Vega option. You can find an option named Load Product Through Ajax as shown as below screenshot. Enable that option and save the changes.
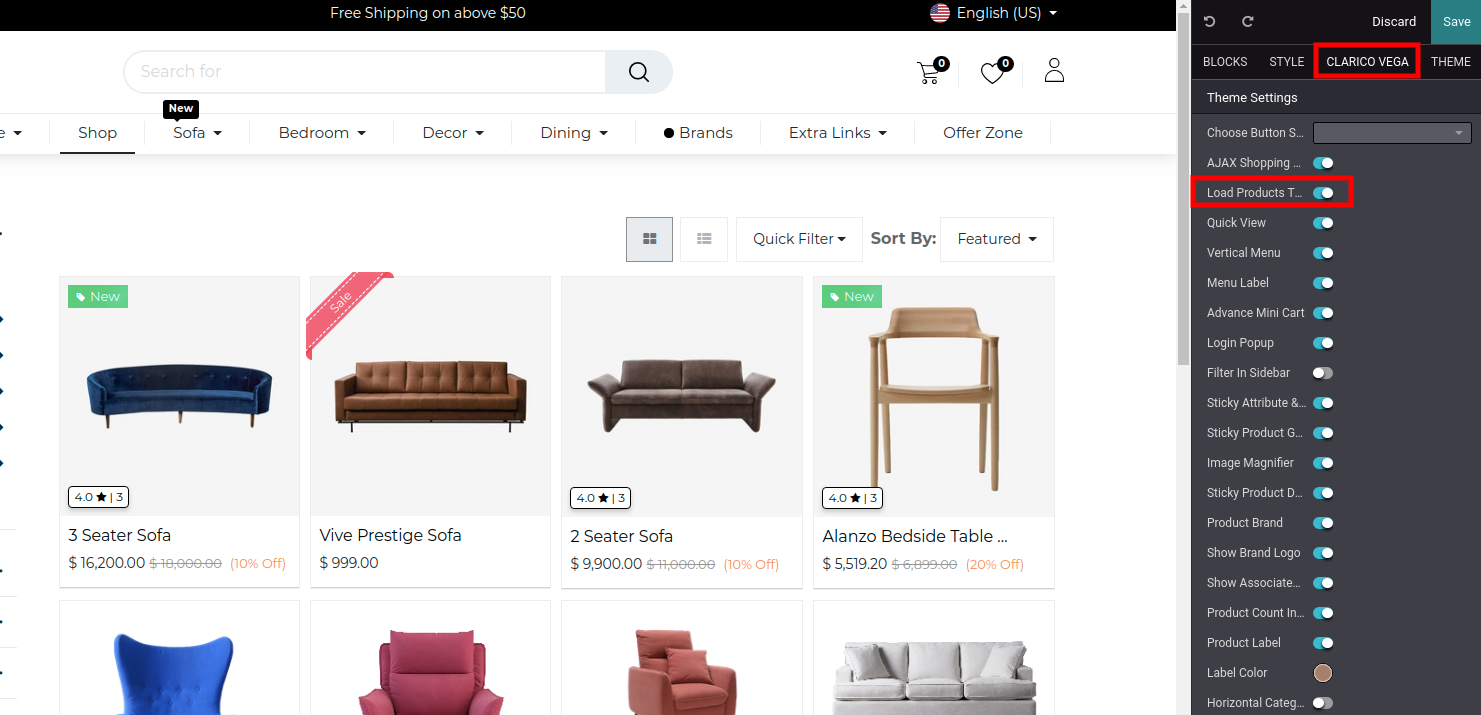
Load Products Through the Ajax feature will work with attributes only. {:toc}
16. PRODUCT BRAND
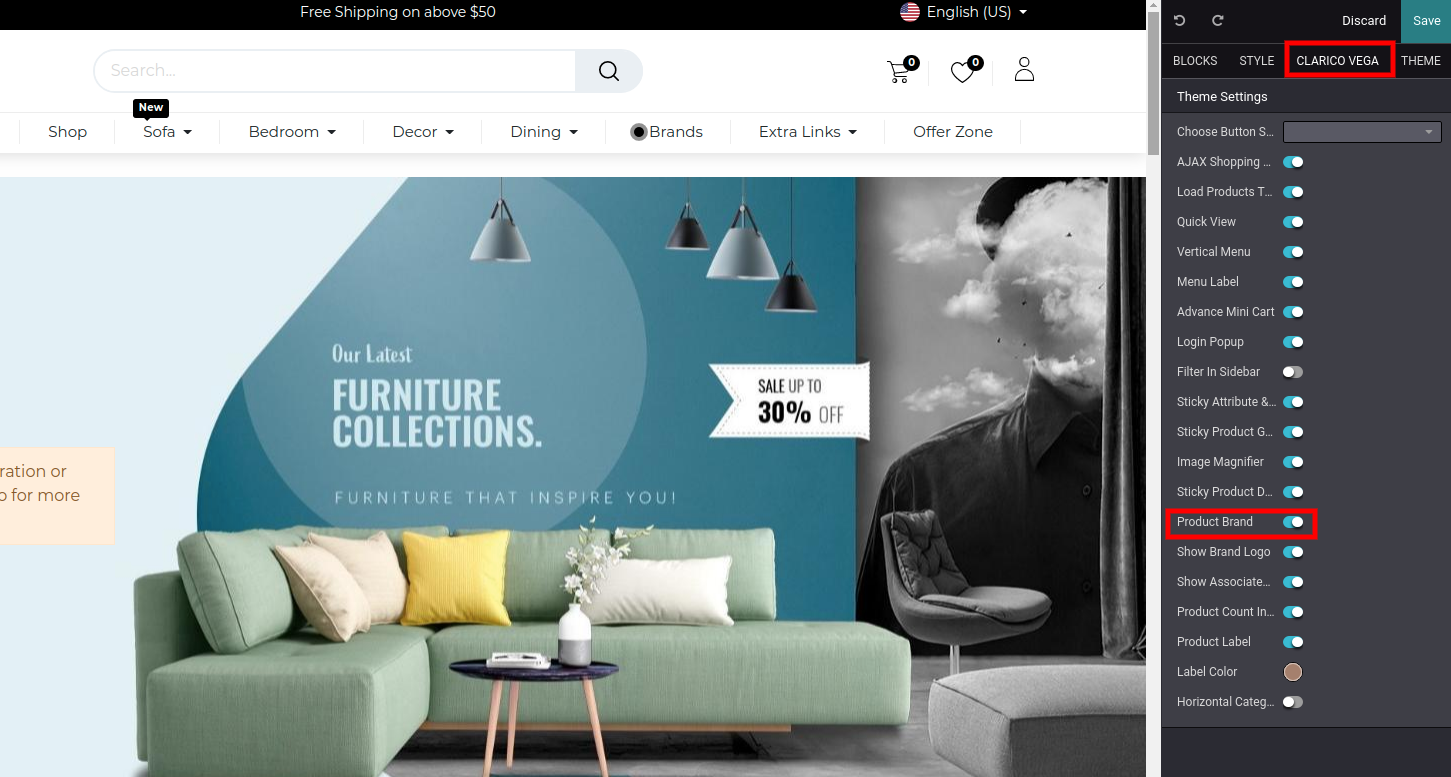
To enable Product Brand, open Website Editor from the Website & click on Clarico Vega option. You can find the Product Brand option as shown as below screenshot. Enable that option & save the changes.
In the admin side, go to Website / Configurations / Product Brands. You can configure the brand details as well as can assign products as shown as below screenshot.
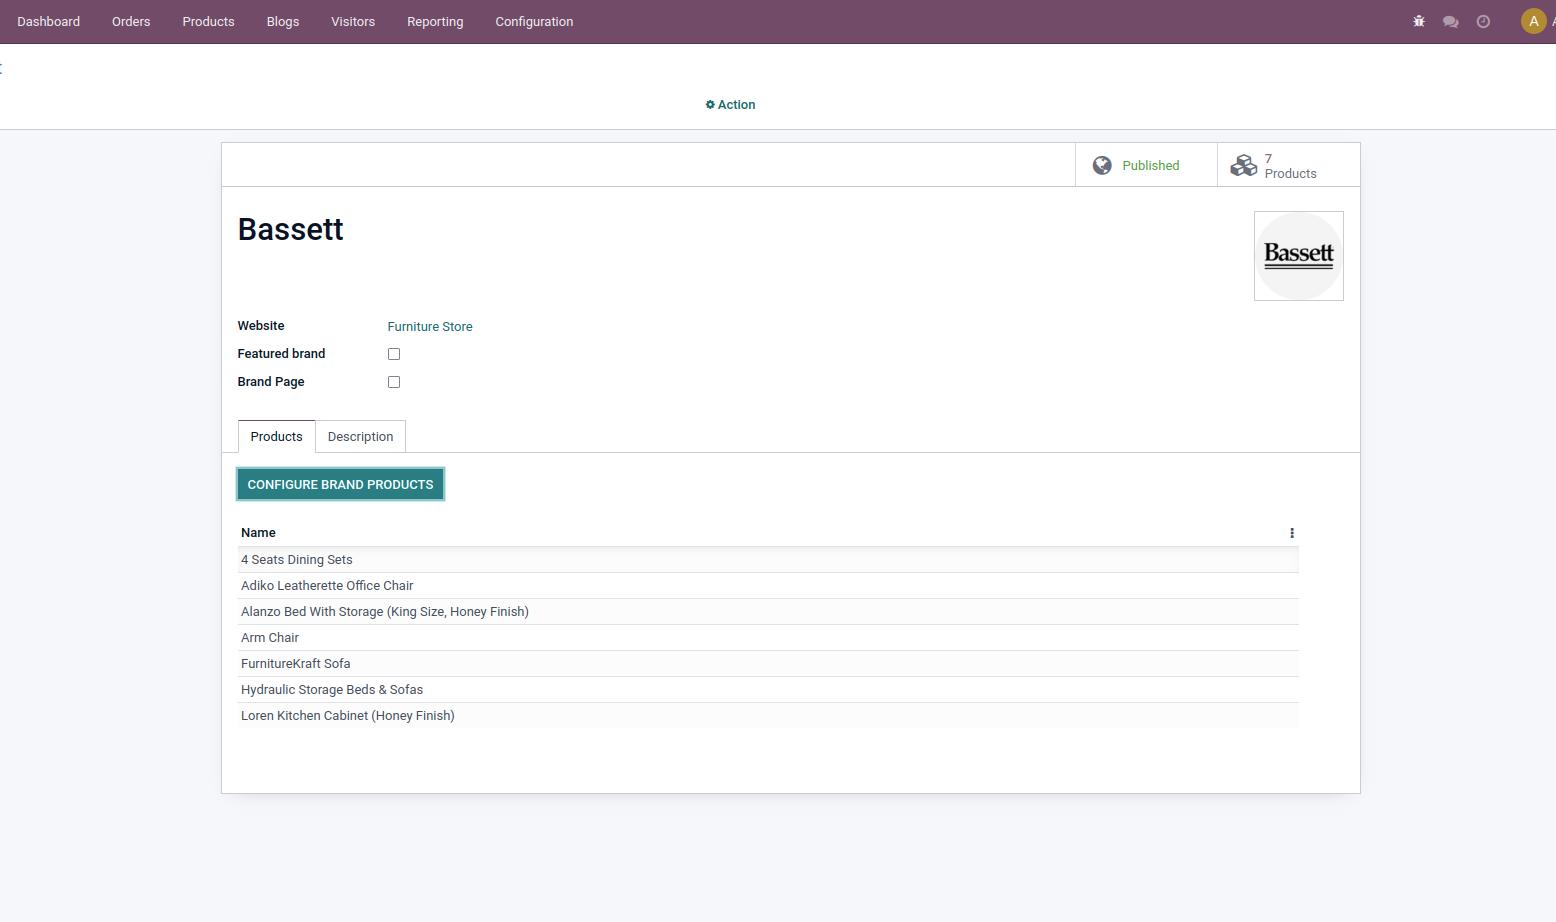
As shown in the screenshot, Fill up the details of your brand and it will be preferable to upload the logo size 130 X 130px. Also, don’t forget to publish the brand. After creating a brand, go to the product view and assign it to the product. Save the changes.
For configure brand in product record, open that product in admin backend view & assign brand as shown as below screenshot.

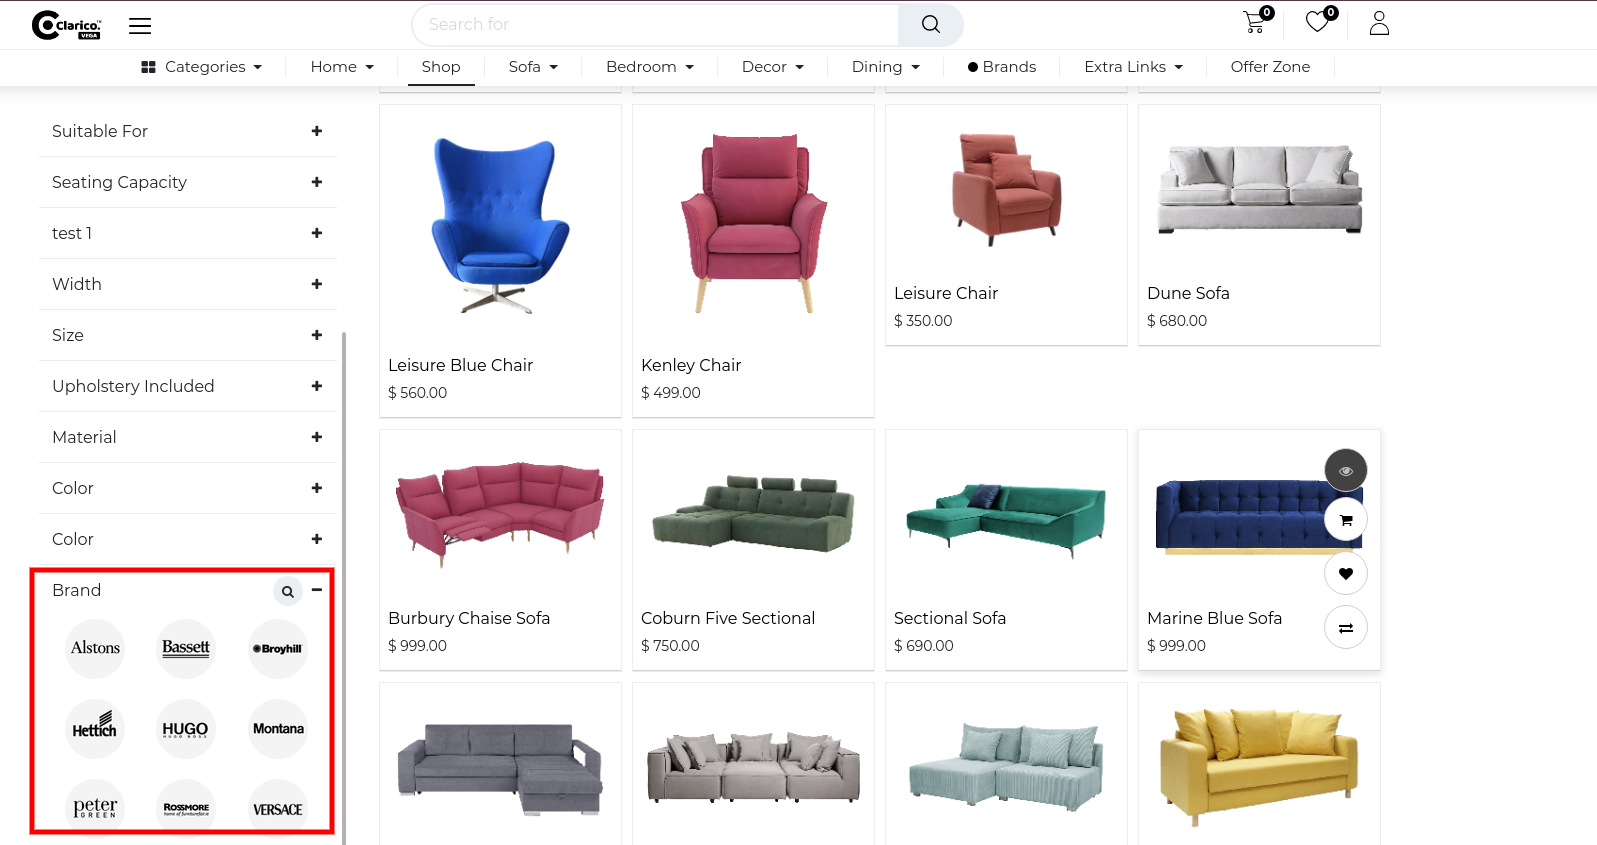
Brands filter in Shop page after attribute listing.
 {:toc}
17. PRODUCT DESCRIPTION
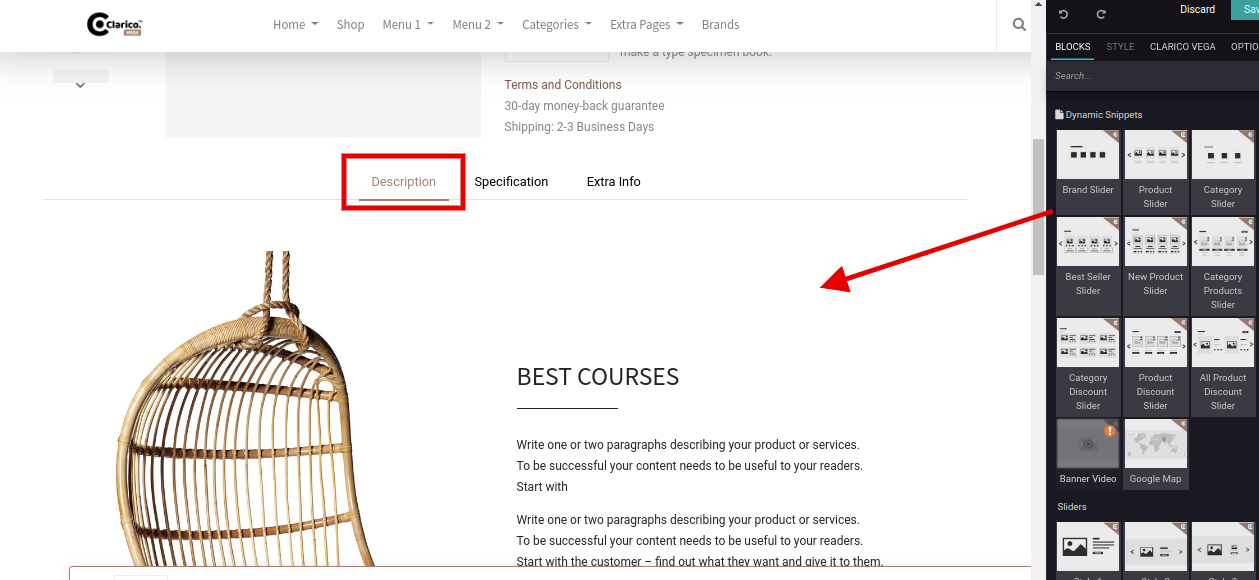
Open any product on the website and click on the Edit button from top right. From the Website Snippet editor, you can drop & design the product description as per the needs as shown below screenshot.
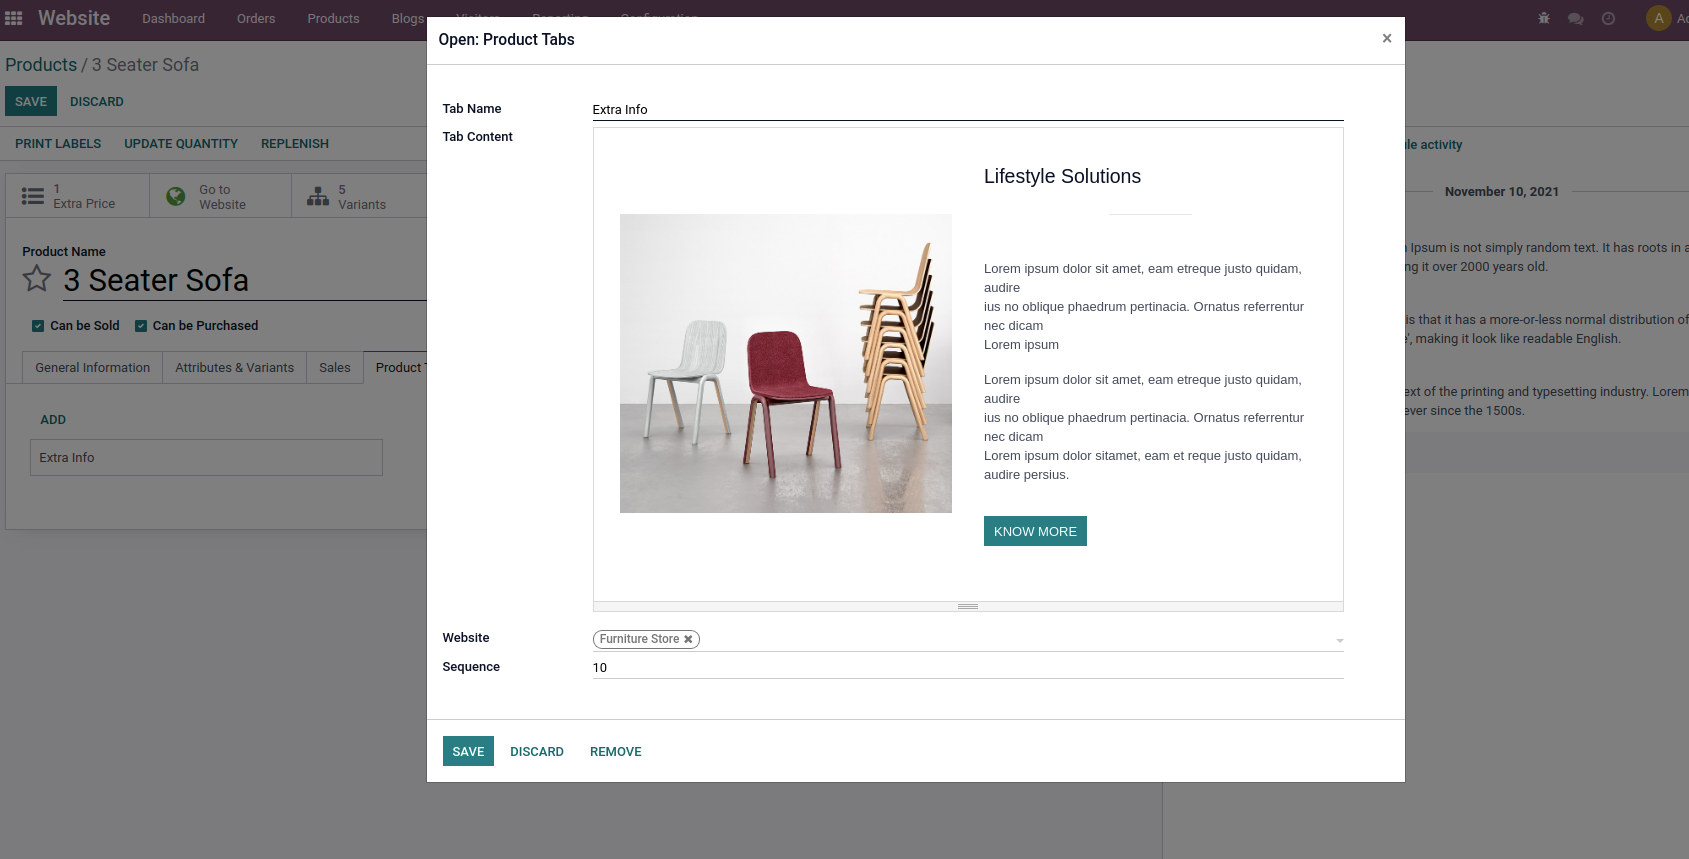
18. DYNAMIC PRODUCT TABS
You can easily configure multiple tabs on the product page with this feature. The product tabs can be designed wisely and displayed in the product tab section.
Steps to configure Dynamic product tabs:
Step 1: Go to the Product backend of a particular product where you want to add the extra tab and click on the edit button.
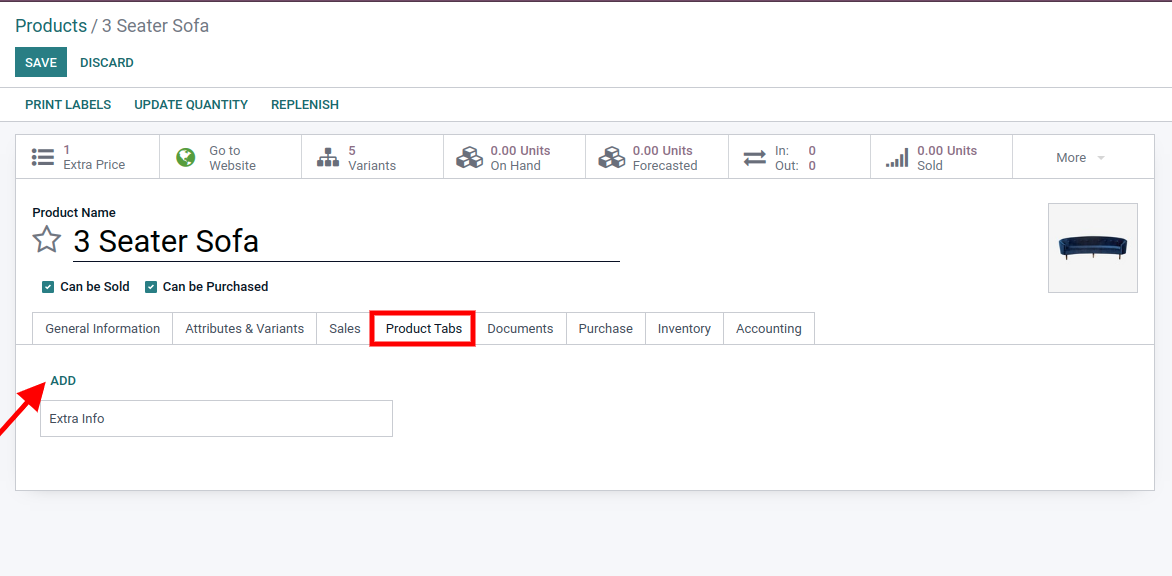
Step 2: Simply go to the Product tab option, you will find the Add link. By clicking on the Add link Create Product Tabs popup will appear. Specify the Tab name, Content (you can directly add Html content over there) and you can set this option for web-site as well.

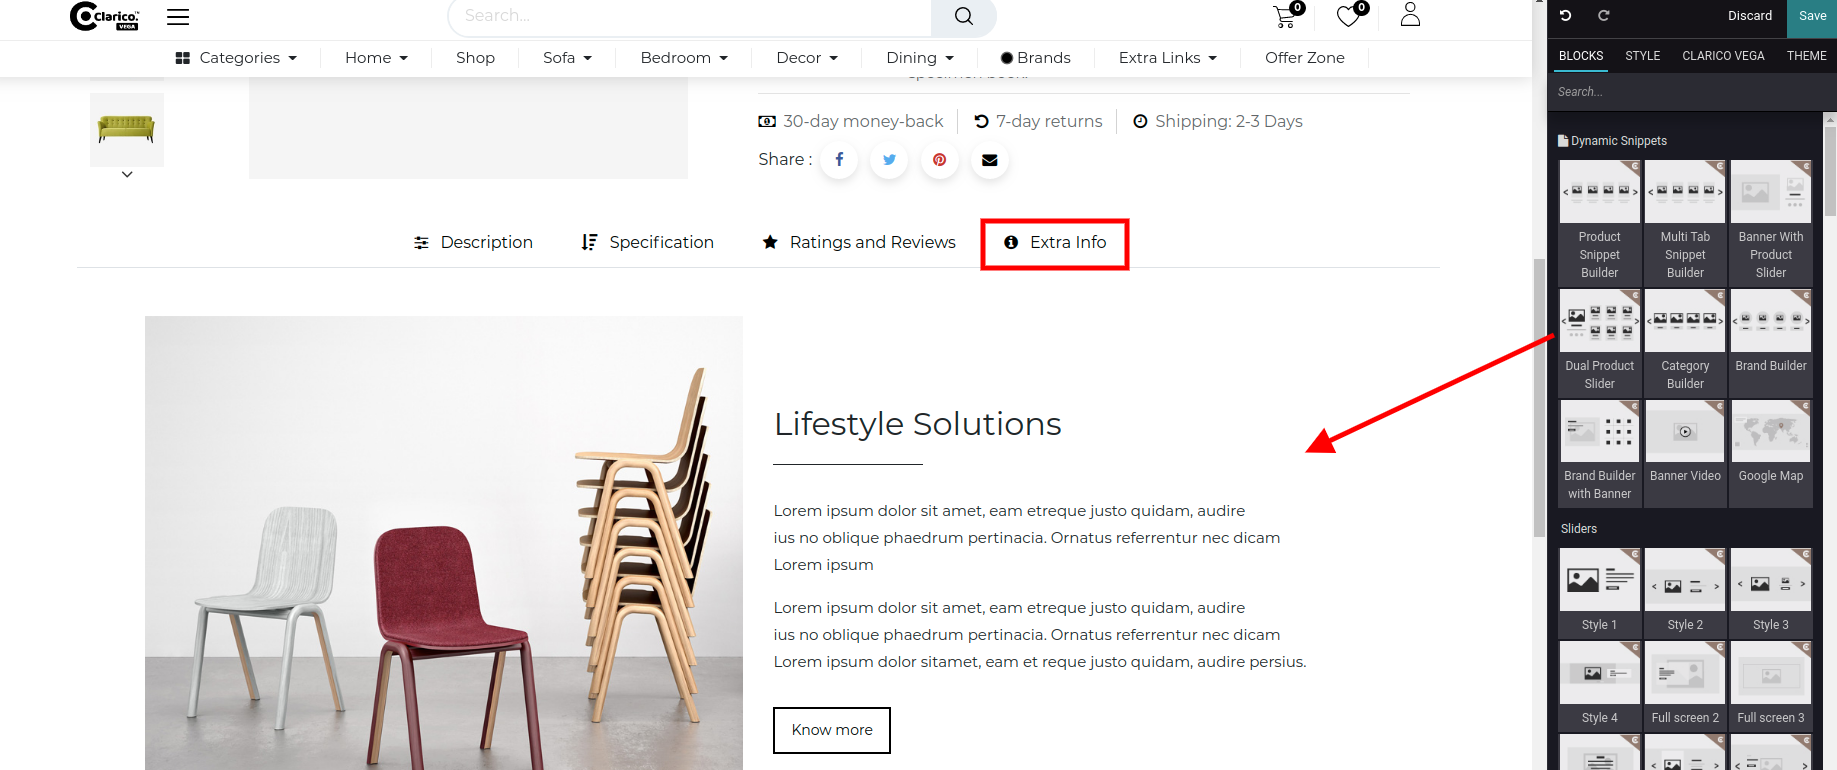
If a website is not selected while creating a tab then it shows in every web-site where you installed the theme.
Step 3: Go to the product page in the website & click on the Edit button from top right. You can configure the snippets inside the product tab as shown in below screenshot.
19. OFFER TIMER
We are providing an offer timer based on All Products, Product Category, Product and Product variants. It shows the remaining time countdown of product offers on a product page.
To configure the offer timer, you need to configure a pricelist. Make sure the discount and multiple sale pricing are activated from the website settings. Once you click on Add a line of pricelist, One pop up will open. Select appropriate ‘Apply on’ option and configure Start Date, End Date, Display Timer and Offer Message.

You can see the Offer timer in the Product page as shown in above screenshot.